
How to Start Seeds Without Wasting Time or Space

When I first started growing plants from seed, I made things harder than they needed to be. I planted a lot of seeds, started them early… and didn’t really think about where they would go once they were ready for the garden.
What I learned is that seed starting works best when you plan first… not after.
Once I changed my approach, everything felt easier. The plants grew better… and the whole process felt calmer.
In this article, I’m going to walk you through the seed-starting process I use now. It focuses on planning first so your seedlings and your garden are ready at the same time.
If you’d rather watch than read, check out my YouTube video on this topic:
Subscribe to my YouTube channel for more gardening videos!
Step 1: Decide Where Your Plants Will Go First
Before you start seeds indoors, you need to know where those plants will go outside. This step is easy to skip, but it makes a big difference.
If you start seeds without a plan, you can end up with healthy seedlings and nowhere to put them. That’s frustrating, especially if the weather isn’t ready yet.
I start by looking at my garden space first. In my case, I’m working with beds along a walkway. Each bed is six feet long. This is the same process I use when designing a garden layout, even if I’m only planning one small area.
I sketch the space on graph paper. I keep the scale simple. Two squares equal one foot. That means each square is six inches by six inches.
Once the space is on paper, it’s much easier to see how plants will fit. You can stop guessing and start making decisions.

Step 2: Choose Seeds That Match Your Space
Once the space is planned, then I choose seeds.
You can flip through seed catalogs, visit a garden center or search online. Seed catalogs are great for ideas, but they don’t tell you everything you need to know.
When I’m deciding what to plant, I look at a few key things:
- How much sun the plant needs
- Whether my garden can provide that
- How tall the plant will get
- How wide it spreads
- How it fits into the color plan
Knowing how much sun your garden actually gets matters here. If you’re not sure, creating a sun map for your garden can make this step much clearer and help you avoid guessing.
For this bed, I wanted magenta and lime colors, so that helped narrow my choices. Color is part of the decision, but it comes after making sure the plant will grow well in that space. If choosing colors feels overwhelming, simple secrets for creating garden color schemes walks through an easy way to put colors together without overthinking it.
Seed catalogs often leave out details like germination time or whether seeds should be started indoors or outdoors. When I find something I like, I look it up online to fill in the gaps. This is especially helpful if you’re newer to flower gardening and still learning how all these pieces fit together.
If that’s you, flower gardening for beginners is a good place to start.
Plants that fit your space are easier to grow. That alone makes gardening feel simpler.
Step 3: Find Your Frost Dates
Your frost dates guide your timing.
The spring frost date is the last date it’s likely to freeze, which means temperatures below 32 degrees. Tender plants shouldn’t go outside before this date.
If you’re unsure what your frost dates are, search for your zip code on Farmer’s Almanac — it will show your last spring frost date and first fall frost date.
This gives you:
- Your last spring frost date
- Your first fall frost date
- The length of your growing season
Once you know your spring frost date, you can plan backward instead of guessing.
Starting seeds earlier doesn’t usually help. It just means you’re caring for them indoors longer than necessary.
Free Gift: Gardening Task Lists for EACH Season
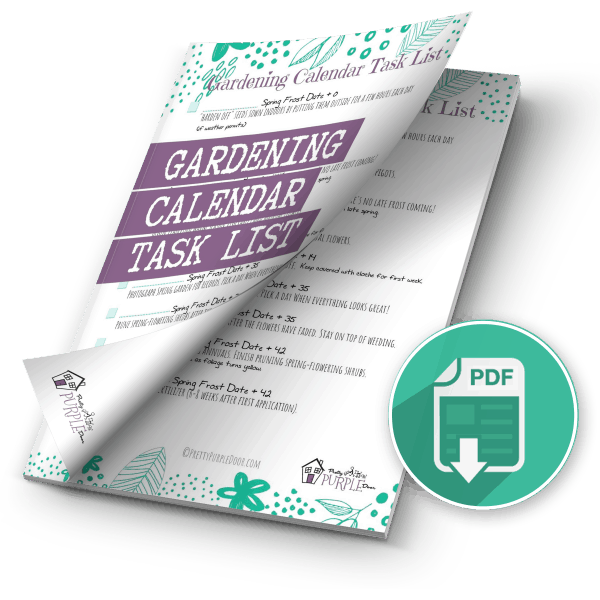
Get a free printable gardening calendar with example tasks for each season plus a BONUS “Gardening Goals” printable worksheet!
Step 4: Create a Simple Seed-Starting Worksheet
To stay organized, I use a simple worksheet. It doesn’t need to be fancy. It just needs to hold the information you’ll actually use.
For each plant, I write down:
- Whether the seeds should be started indoors or outdoors
- How many weeks before the last frost to sow them
- How long it takes to go from seed to bloom
- How much space each plant needs
- How tall the plant will get
- Any notes I want to remember
Most of this information is on the back of the seed packet.
For example, one of my plants needs to be started indoors four to six weeks before the last frost. It takes about sixteen weeks to bloom and needs around twelve inches of space.
Writing this down makes the next steps much easier.
Image note: Handwritten seed-starting worksheet with labeled columns and a few filled-in rows
Step 5: Count Back on a Calendar
This is where planning really starts to click.
I take a calendar and mark my spring frost date. Then I count backward.

If a plant needs to be started five weeks before the last frost, I count back five weeks and write down that date. Now I know exactly when to sow those seeds.
I also count forward to estimate bloom time. This helps set expectations.
Many gardeners feel disappointed when plants don’t bloom as early as they expected. Knowing the timing ahead of time changes how the season feels.
Step 6: Figure Out How Many Plants You Actually Need
Now I go back to my garden drawing.
Each square represents six inches, so spacing is easy to see. I start with the largest plants first since they need the most room.
Then I fill in smaller plants around them. I erase and adjust as I go. That’s normal.

Once I know how many plants fit in the space, I plan for extra seeds. Not because I want extra plants, but because seed starting always comes with some natural loss.
I usually double the number I need. That gives me enough plants to fill the bed without stress.
Most people start far more seeds than they actually need. Planning helps prevent that.
Step 7: Follow the Seed Packet Instructions
Seed packets are one of your best resources.

They tell you things like:
- How deep to plant the seeds
- Light requirements
- Soil needs
- Whether seeds should be covered
- Whether they should be started indoors or outdoors
If something isn’t clear, I look it up online. Johnny’s Seeds is a great resource for detailed growing information.
You don’t need fancy equipment. A basic seed-starting mix, containers and light for indoor growing are usually enough.
Step 8: Harden Off Your Seedlings Before Planting
Once the risk of frost has passed, seedlings still need time to adjust before going into the garden. This process is called hardening off.
I take the plants outside for about an hour the first day. Then I increase the time a little each day over about five days.
This helps them adjust to sun, wind and temperature changes. Skipping this step can stress plants and slow them down.
Seed Starting FAQ
When should I start seeds indoors?
Most seeds are started a certain number of weeks before your last spring frost date. That information is usually on the seed packet. Once you know your frost date, you can count backward on a calendar to find the right time.
How do I know how many seeds to plant?
Start by figuring out how many plants will fit in your garden space based on spacing. Then plan to start extra seeds to allow for some that don’t germinate. Many gardeners double the number they actually need.
Is it bad to start seeds too early?
Starting seeds too early often creates more problems than it solves. Plants can become leggy and stressed if they have to stay indoors too long. Planning around your frost date helps avoid this.
Do I have to start seeds indoors?
No. Some seeds do better when they’re sown directly in the garden. The seed packet will tell you whether indoor or outdoor sowing is recommended.
Why do I need to harden off seedlings?
Seedlings grown indoors aren’t used to sun, wind and temperature changes. Hardening off helps them adjust slowly so they’re stronger and less stressed when planted in the garden.
What if my seedlings don’t look perfect?
That’s normal. Seed starting is a learning process, and plants are more resilient than we think. Focus on good timing, proper spacing and healthy conditions rather than perfection.
Wrapping Up
Seed starting doesn’t need to feel rushed or overwhelming.
When you plan first, everything feels steadier. You know what to plant, when to plant it and what to expect as the season unfolds.
Save your seed packets, even when they’re empty. They’re useful references and helpful if you want to save seeds later. They can also help you grow more without spending more, which matters if you’re trying to garden on a budget.
Gardening is a process. Each season builds on the last. As spring approaches, seed starting is just one part of the bigger picture. If you’re thinking ahead to planting and design, spring flower gardening ideas can help you pull everything together.
Start with a plan. Take it step by step. And let the garden do what it’s meant to do.
More Gardening Posts You’ll Love
Shop my Amazon storefront for my essential gardening books & tool recommendations!


