
Don’t Toss Your Cookies! – FineWoodworking

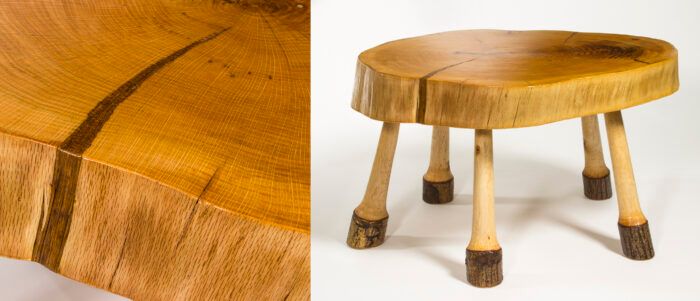
In April 2014, I was driving home after a big storm and came across an orange Asplundh truck whose crew was taking a lunch break in the middle of bringing down a tree. I pulled over. Before getting out, I quickly joined the “Fellowship of the Orange Vest” and grabbed a hardhat. Twenty minutes later I had two 30-in. by 22-in. by 5-in. red oak rounds in the car and no idea what I was going to do with them. Those boys wouldn’t even take my money.
The slabs landed in a garage and sat for years. In 2017 my niece’s hubby bagged a nice buck, and one became a deer mount. Fast-forward 10+ years to now, when the neighbor renting me that garage sold his house. I had to clear out a whole lot in a short time. The slab needed to go, and so did a maple sapling cut a few years earlier, so a project was hatched. It’s now a table or a stool or a bench depending on who’s looking at it.

I have made two past projects from cookies: the deer mount and a small table. The table was thick, burly maple and never split. The deer mount split and I didn’t care. This project, however, needed a fix or a fill.
People ask how to keep a round slab from splitting, and for most woods, short of chemical treatment you really can’t. We all know that wood shrinks as it dries. We also know that it shrinks the most through the tangential plane. In general, flatsawn lumber shrinks the most. According to the Shrinkulator, from 40% to 10% moisture content, a 6-in. flatsawn oak board will shrink about half an inch. If you picture a tree as a series of wet, flatsawn boards standing around the pith, as they dry, gaps will open up between them. In Understanding Wood, Hoadley tells us that sapwood has a higher moisture content than heartwood and will shrink more. These combined elements result in most cookies becoming Pac Man. My round was 75 in. in circumference, and the open external cracks added up to just over an inch.

The main crack in the slab was long, irregular, and curved in three dimensions. I am not a fan of epoxy pours, and I could not see a way to carve a piece to fit without chopping out a flat pizza wedge at the bandsaw. Wanting to fill the cracks with wood, I started playing with leftover shop-cut veneers. I could slide a veneer into the crack and form it to the shape. Once the first was in, the next one slid in next to it and the next. By choosing which gaps were next, I was able to fill in the space pretty completely. The ends were an issue; each left a triangular hole where it stopped, and I could not pound them in and add stress inside the crack. I needed tapered veneer.

I had some quartered brown oak that was wide enough to cover the length of the crack. The veneer is cut to fit width-wise to match the grain direction and be more flexible. I cut some veneer and then ran it through the drum sander with Cheerios cardboard steps taped underneath. I wound up with 8-in.-wide veneer, 3/32 in. thick, tapering thinner on both edges.
I crosscut the veneers just wider than the slab. They slid into the crack easily but were pretty fragile. As each went in, they snugged up close, and there were virtually no gaps. I chose the insert points carefully, and the stacked veneer got wider and filled the crack beautifully. This was going to be a very messy glue-up. I prefinished the top with two coats of Danish oil to guard against glue staining.

Using a silicone comb on a bucket lid, I covered each layer with way too much liquid hide glue and slid them home. I picked liquid hide glue because it’s slippery and takes a while before it really sticks hard—and it would match the brown oak. For small gaps and surface openings, I snapped off and pushed in pieces of veneer.

When the glue was dry, I took off the excess with an oscillating saw. I filled in small gaps with slivers, then planed everything flush. As a bonus, the spelching from planing filled some gaps; however, some of the veneer tore out to make new ones. Sanding down the trimmed ends may have left a cleaner result.

After getting as close as I could with a gouge, I smoothed out the sides with an Ultimate Scraper from Stewmac and was able to match the look and feel of the natural live edge.

I couldn’t help but count the 58 rings. As it turns out, the 1955-2014 dates covered the birthdays of my sister, her husband, and their now 21-year-old son. I put a brass pin in the annular ring for each of them and gifted the table/stool/bench to my nephew for his 21st birthday. It’s now known as the Family Tree.
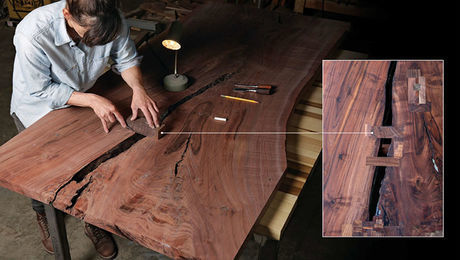
How to Add Strength and Style to Any Slab
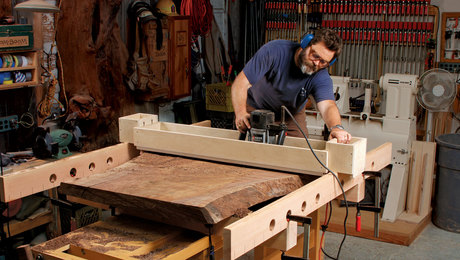
Level Big Slabs in No Time Flat
Sign up for eletters today and get the latest techniques and how-to from Fine Woodworking, plus special offers.


