

Synopsis: Inspired by the bronze stenciling that’s a distinguishing feature of the Hitchcock chair, Aspen Golann looked for a way to create her own images. She needed to figure out a way to execute the style without using the antique stencils. Her solution was the airbrush, which has allowed her to add painted details to wood surfaces with a degree of detail, control, and creativity that is unavailable with stencils. In this article, she provides instructions on gathering tools and materials, operating the airbrush, preparing the surface with milk paint and shellac, and creating a stencil in stages by cutting away sections of painter’s tape.
I split my time between painting and British and early American furniture making. That combination inevitably led me to the splashes of gold imagery on the omnipresent Hitchcock chair. You may not own one or have looked closely at an original, but there’s no doubt you’ve seen them in kitchens, thrift stores, or books. Bronze stenciling became popular in the early 19th century, and while Connecticut manufacturer Lambert Hitchcock was famous for it, he didn’t invent the style. Instead, it started in Pennsylvania and New York with people who admired the filigree and inlay of imported French furniture. Thrifty and ingenious U.S. cabinetmakers replaced the expensive metal inlay with bronze powder and gold leaf. In some ways it was a simplification, but it was still high-style craft, requiring enormous skill and time.

While I was inspired by the history, what I really wanted to do was develop my own images. To do so I had to figure out how to execute the style without using the antique stencils Hitchcock was known for. That’s how I landed on the airbrush. This little tool unlocks a degree of detail, control, and creativity that a stencil can never rival. In time I honed my airbrushing skills, and along the way I developed an approach that simplifies the process so fellow woodworkers can easily create stunning painted furniture without years of drawing practice. Whether you’re designing original furniture, repainting a set of chairs, or embellishing an instrument or a small box, my process will help you take a creative and contemporary approach to a traditional American style.
The airbrush
 |
| An inexpensive nail-art tool is a great way to start experimenting with airbrushing without having to commit to higher-end equipment. The one on the left. from Ykall, is available on Amazon for $30. When you’re serious: this airbrush kit, complete with a compressor and all the tools needed to get started, will give you unlimited possibilities for applying stenciled art to your furniture pieces. Pictured on the right is a kit from Timbertech, that sells for $80 on Amazon. |
The first thing you’ll need to do is collect a small set of essential tools and materials. The list obviously starts with an airbrush, which uses a compressor to push air and paint through a needle tip, allowing for lots of fine lines and detail.
 |
 |
| Pour in your paint. Airbrush paint is widely available in many varieties. For best results, it should have a consistency like milk. Add airbrush media or some form of thinner one drop at a time, checking the viscosity as you go. | |
Next, you’ll need paint and an airbrush medium. You can buy airbrush paint in a wide variety of colors from online retailers. However, I find that most paints, whether you buy them mixed or you mix the pigments yourself, are too thick for my airbrush, leading to clumping or unintentional speckling. To get the right viscosity, I add an airbrush medium one drop at a time until the paint is the consistency of milk. There are two kinds of airbrush media: thinners and flow improvers. A thinner is used simply to thin the paint, whereas a flow improver can be useful for already thin paint, detail work, and small needles. Flow improver has a drying retardant that keeps the tip of the airbrush from drying out. If you just need a thinner, denatured alcohol, which many of us have on hand already, works well.
The airbrush is a delicate tool and requires regular cleaning. It’s easier to clean the brush before the pigments dry inside the barrel and tip, so I get ready to clean before I even start painting.

The controls on the airbrush are simple: There’s a trigger and a slide. The trigger controls how much air passes through the nozzle, and the slide controls how open the nozzle is, which determines how fine your line is. Opening the slide just a little bit produces a fine line, and pulling the slide back farther makes the line wider. Pressing down harder on the trigger makes the line darker. For this type of Hitchcock painting, I do a lot of my work with the trigger half down (to let out just a bit of paint) and the slide pulled all the way back to get a wide, even stroke. The airbrush lays down paint quickly, but keep a steady motion. Gingerly add a little bit of paint at a time.
If the tool begins to spit or clog during use, press the trigger and pull the slide back until the clog clears and the brush sprays evenly again. If this doesn’t work, temporarily pour your paint into a container and clean out the airbrush. Before restarting, assess the consistency of your paint and consider thinning it a little.
Imagery
 |
 |
My method begins with coats of milk paint and then shellac on the surface to be embellished. When those cure I cover the surface with painter’s tape and draw my design on the tape. I then cut away parts of the drawing, removing the tape to yield a stencil.
 |
 |
There are a few things that determine what type of image will make a good stencil. The Hitchcock style is typically monochromatic or grayscale, and ideal images are high contrast, with sharp lines between light and dark. So it’s important to visualize or draw your image in grayscale to see if it is still easy to read and retains its visual impact. The other trick to a realistic, eye-catching image is to choose your lightest lights and darkest darks ahead of time and make sure not to mix them or blend them together. Your eye perceives dark areas as farther away or “lower,” and light areas, or highlights, it perceives as closer to the eye or “higher.” Use your lights and darks intentionally to maintain the power of the illusion, and keep them in mind throughout the process. In this image, the lightest lights are the solid gold sections in the foreground, and the darkest darks are the areas in the background, which remain the black milk paint of my base coat.
 |
 |
 |
| 1. Brightest Areas | 2. Midtones | 3. Shadows |
As you cut away parts of the drawing, the little trimmings of sticky, discarded tape can get messy. (You may be pulling them out of your hair and off your bench for weeks.) To keep your workspace clean, have a single place to put the sticky scraps. Some people use a weeding cup to contain the scraps; I often just stick them to a piece of paper or the back of my hand.
One piece at a time

A very important part in this process is determining the order in which to remove the bits of tape. I often sit down with a cup of coffee to think it through before numbering the pieces, just like a paint-by-numbers. The order depends on the image, but there’s a key to success: Begin with any sections that will be fully opaque. In this design, those are the solid gold sections in the foreground. Tackle these first; that way, any overspray from later sections won’t muddy the design. To limit overspray, you can use cardstock or thick paper scraps to shield other sections of the image.
 |
 |
With the fully opaque sections finished, I move on to the less opaque areas, in this case the midground and then the background. I keep working this way until I reach the lowest level of leaves. It’s important to note that this process is entirely additive, so once a color goes down, it’s there unless you sand or scrape the painted section, reapply shellac, and start again. Slow and steady is the name of the game. When you’re finished painting, wait until the paint is dry before removing the rest of the mask to reveal your work.
 |
 |
I hope you enjoy this process and use it to explore new ways to ornament your designs. It took playfulness and innovation to develop these techniques in the 1800s, and by honoring, critiquing, and evolving them we keep them alive.

—Aspen Golann is an artist and furniture maker in New Hampshire.
Aspen’s Webinar on Airbrushing can be found here.
Fine Woodworking Recommended Products

Sketchup Class
If you’re ready to jump into designing with CAD, this is a great place to start.

Drafting Tools
Add a hole guide to this kit, and you’ll have the tools you need to work out your designs with scale drawings.
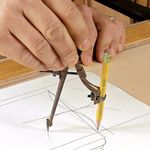
Compass
An essential tool for drawing circles and curves accurately. Also good for layout.
Sign up for eletters today and get the latest techniques and how-to from Fine Woodworking, plus special offers.
Download FREE PDF
when you enter your email address below.
View PDF


