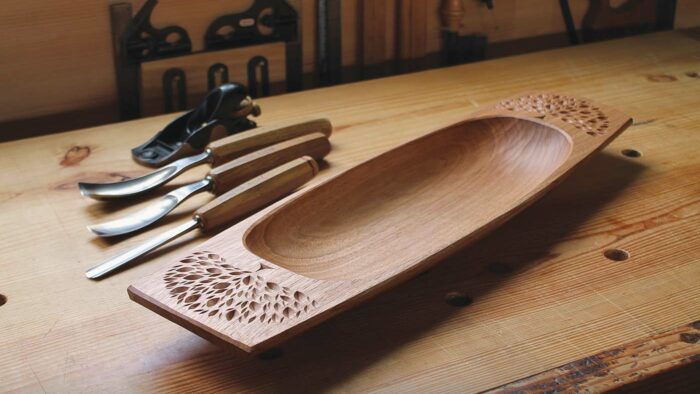
Synopsis: David Fisher has designed a bowl that can be carved from a dry 8/4 board and worked on a standard workbench. In this article, he shares step-by-step instructions for crowning the top, laying out the handles and the hollow, carving the hollow, refining the hollow, creating the side curves, and shaping the underside. All the work is done with hand tools. In a separate Handwork piece, Fisher shares his technique for adding a decorative carved tree.
 No log, no axe, no problem. Many bowl carvers (I happen to be among them) typically work with wood split green from a log and do their carving with the blank on a chopping block and a bowl horse. But this bowl can be carved from dry lumber and worked on a standard workbench. You can use just about any species of wood to make it; I used butternut for this one. You’ll save yourself some trouble by selecting a clear, knot-free board with no fancy figure. If your plank is oversize, I suggest that you begin by trimming it to 2 in. thick, 6 in. wide, and 21 in. long. That said, the dimensions in the plans are easily adaptable.
Flatten the bottom, crown the top, curve the sides
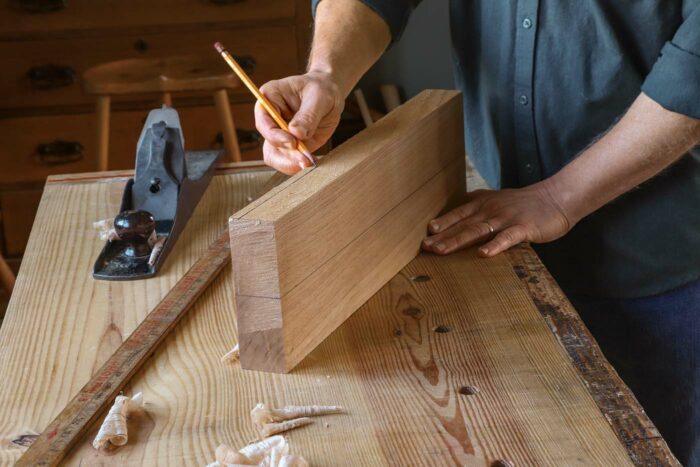
Start the bowl by flattening the bottom of the blank with a hand plane. Then strike a longitudinal centerline on the bottom from end to end. With a square, extend the centerline up both end-grain surfaces. Using your fingers as a gauge, draw a line along both sides 7/16 in. down from the top.
 |
 |
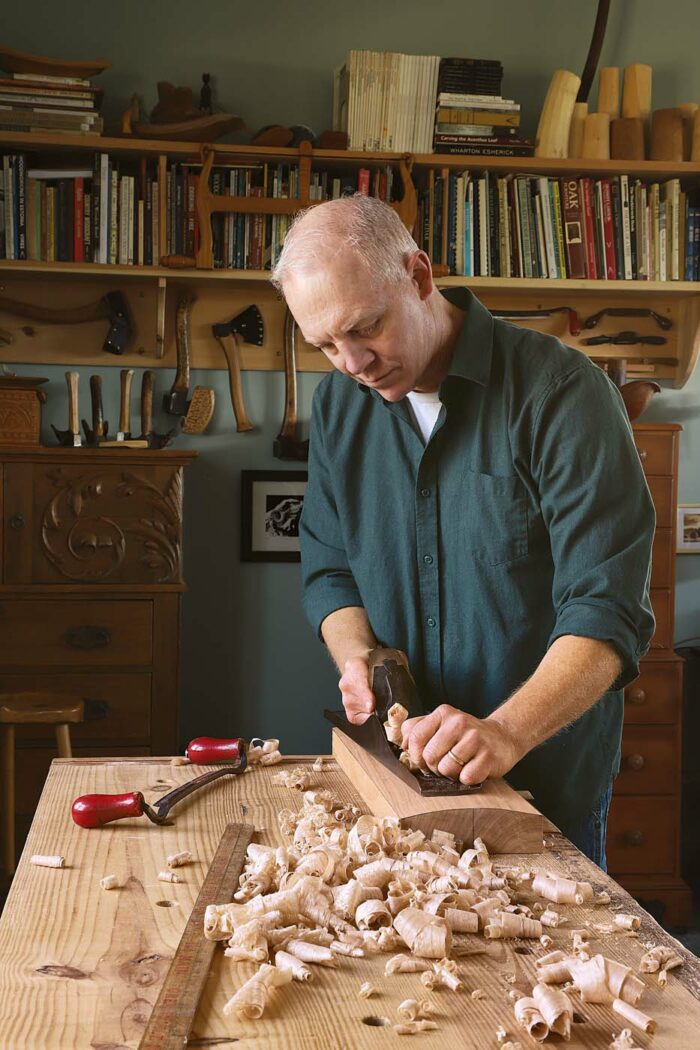
On the end grain, draw an even arc from the end of those lines up to the center of the blank. Then with a drawknife and/or a hand plane, remove the wood above those lines, giving the blank a gently arched top.
Lay out the handles and the hollow
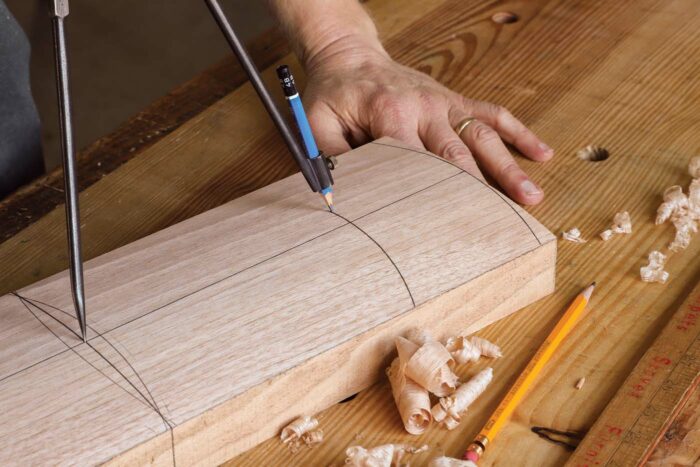
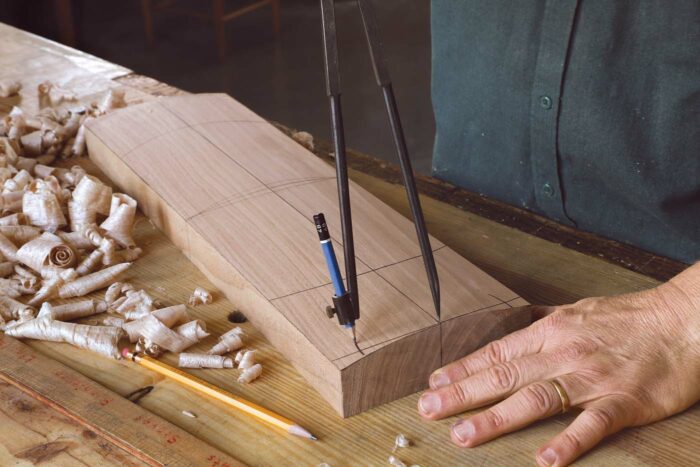
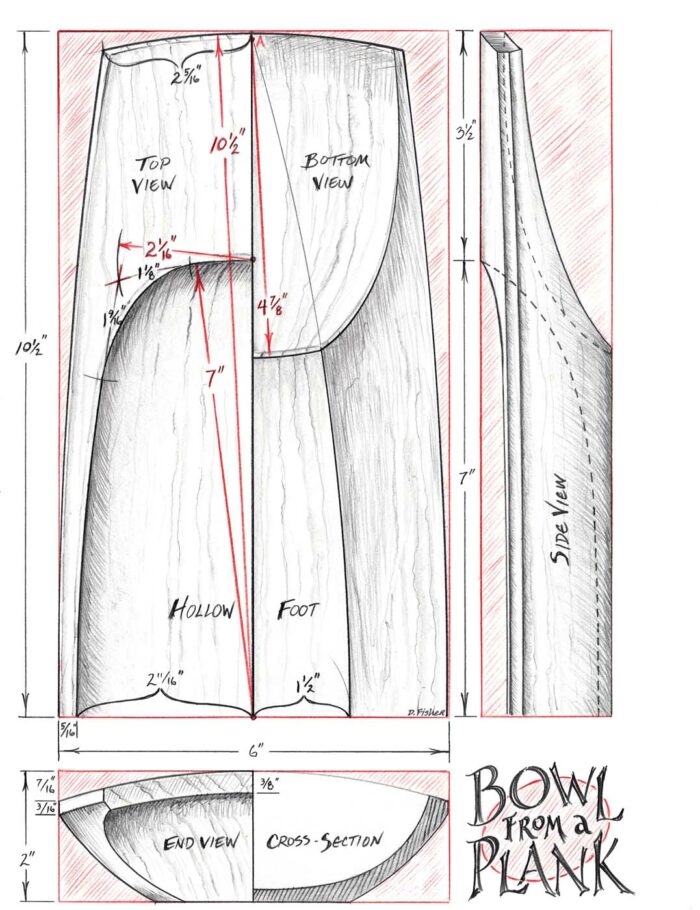
Now the layout of the handles and the hollow can begin. Mark a lateral centerline across the blank’s curved upper surface, and carry this line down the sides and across the bottom. With your pencil compass set for a 10-1/2-in. radius, place its point at the intersection of the centerlines on top and strike an arc across each end of the bowl blank. These arcs represent the ends of the handles. Reset the compass to 7 in. and then strike two more arcs from the blank’s center point. These represent the ends of the hollow.
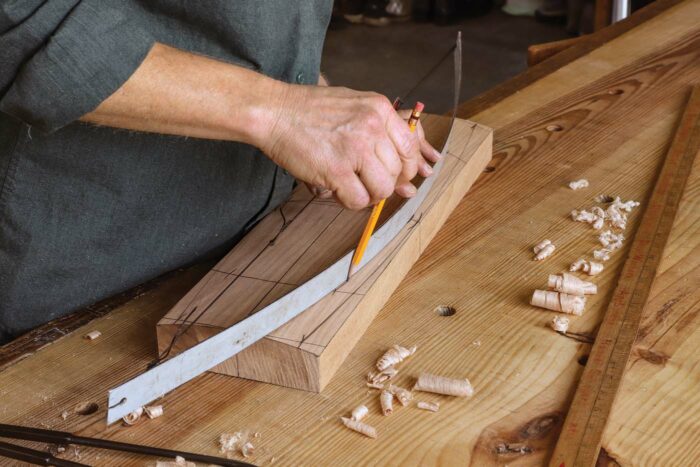
You’re now ready to define the curved sides of the bowl. Set the compass to 2-5/16 in. and place its point at the center of the handle arc at one end of the bowl. Strike tick marks across the handle arc to both sides. Repeat on the other end of the blank. Set the compass to a 3-in. radius, place its point at the blank’s center point, and strike tick marks across the lateral centerline. These tick marks give you three points on each side of the bowl, one representing the widest point of the bowl and two representing the corners. Connect these three points using a pencil and a drawing bow. You can buy a drawing bow or just make one from a slat of wood or a metal rule and a length of string or tape. Adjust the flex of the bow until it creates an arc that passes through all three points. This arc is the outside edge of the bowl.
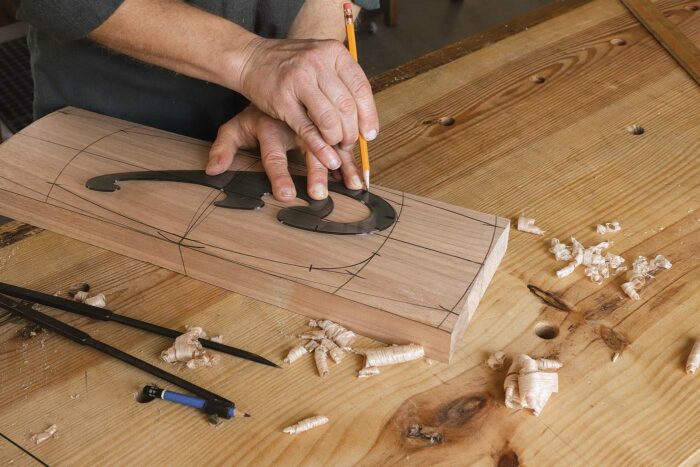
Now mark the side of the hollow in the same way. With your compass set to 2-11/16 in. and its point at the center of the blank, strike tick marks across both sides of the lateral centerline. Reset the compass to a 2-1/16-in. radius and make tick marks across the arcs at the ends of the hollow. Connect those marks with the drawing bow and a pencil to create the side borders of the hollow.
Round the corners of the hollow next, either drawing by hand or using a portion of a French curve. The corner curves should merge with the arcs of the sides and ends seamlessly. You can make marks on the French curve itself to be sure you’re using the same portion to round each of the four corners.
Carve the hollow
To carve the hollow, you’ll need one or two bent gouges (sometimes called long-bents). I recommend an 8/30 (#8 sweep 30mm wide) and a 5/25, but a similar combination could work just as well. If you can only have one, go with the #8.
 |
 |
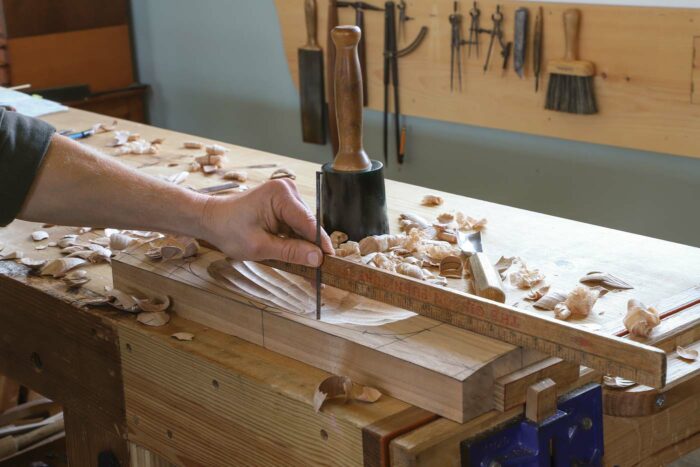
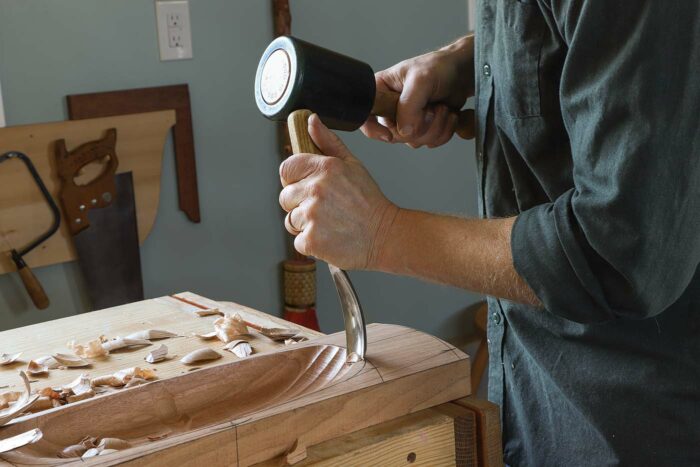
Secure the bowl blank on the workbench and begin hollowing by making an initial trench across the center of the bowl using the #8 bent gouge and a mallet. This will only be maybe 1/2 in. deep at the center. Then, working with the grain (perpendicular to the trench), make a series of side-by-side cuts into the trench starting from 2 or 3 in. back. These chips will release when they meet the trench. Do this from both directions, then repeat the procedure. Each time, the cross-grain trench will get deeper and the end cuts will get deeper and will start closer to the ends of the hollow. When you begin to wonder how much wood is left under that trench, take a moment to measure using a straightedge along the top and a rule extending down into the center of the hollow. Stop when you get close to 1-3/4 in. You want to leave about 1/4 in. of wood at the bottom center when the hollow is finished. As you shape the hollow, keep in mind that it should be steep at the edges and transition to a shallow central area.
 |
 |
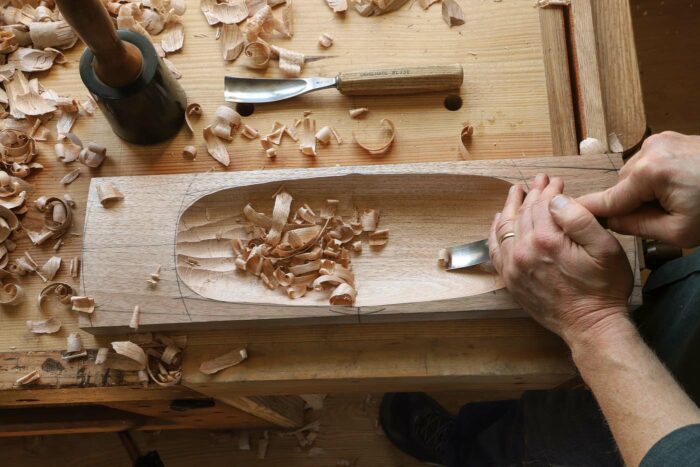
When nearing the final surface, put the mallet aside and switch to paring cuts, using your body weight to propel the gouge in smooth movements, raising or lowering the handle to control the depth of cut. The #5 gouge, with its flatter curve, will leave a more subtle surface, especially in the flatter central areas along the length of the hollow. Work with the grain from both ends, being careful to take light cuts where the grain direction merges across the center. I prefer to leave the surface straight from the gouge, but if you’d like to scrape or sand the surface smooth, that’s an option.
Refine the hollow
Create the side curves
 |
 |
With the hollow finished, begin on the exterior by shaping each of the long sides to a curve. Use a drawknife, possibly followed by a block plane or spokeshave, and keep the cut plumb at this point. Then, using your fingers as a gauge, draw a pencil line along the side, 3/16 in. below the top.
Shape the underside
Now you can lay out the underside of the bowl and the foot. Set the compass to a radius of 1-1/2 in. and strike a circle at the center of the bottom.
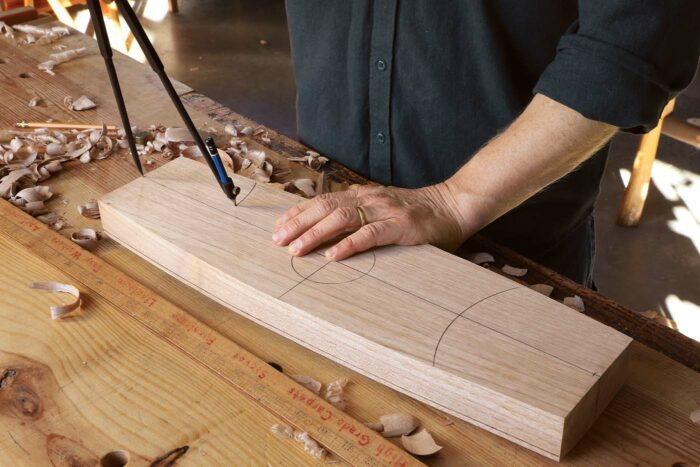
Where that circle intersects the lateral centerline is the widest point of the foot. Reset the compass to a 4-7/8-in. radius and place the point 10-3/8 in. from the center. (This will be just a smidge in from the end of the blank, but I’ll call it the endpoint; it’s labeled A at the top of the drawing.) Strike an arc across the bottom. Repeat at the other end.
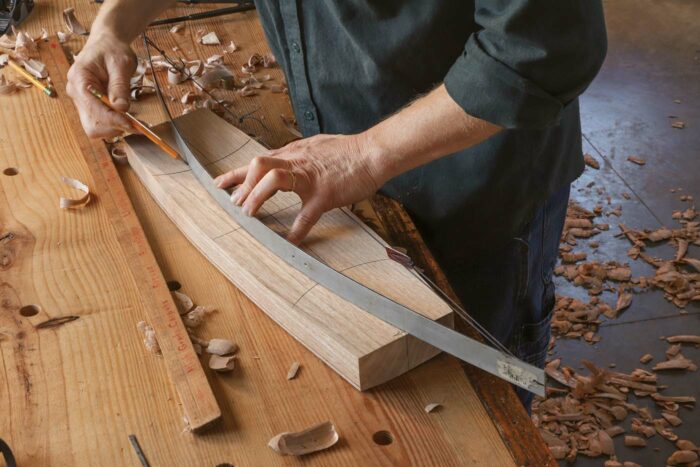
With the drawing bow, draw two arcs, each connecting both endpoints with the widest part of the foot. Next, draw a gently curved line on the end-grain surface connecting the endpoint to the lower corners of the handle.
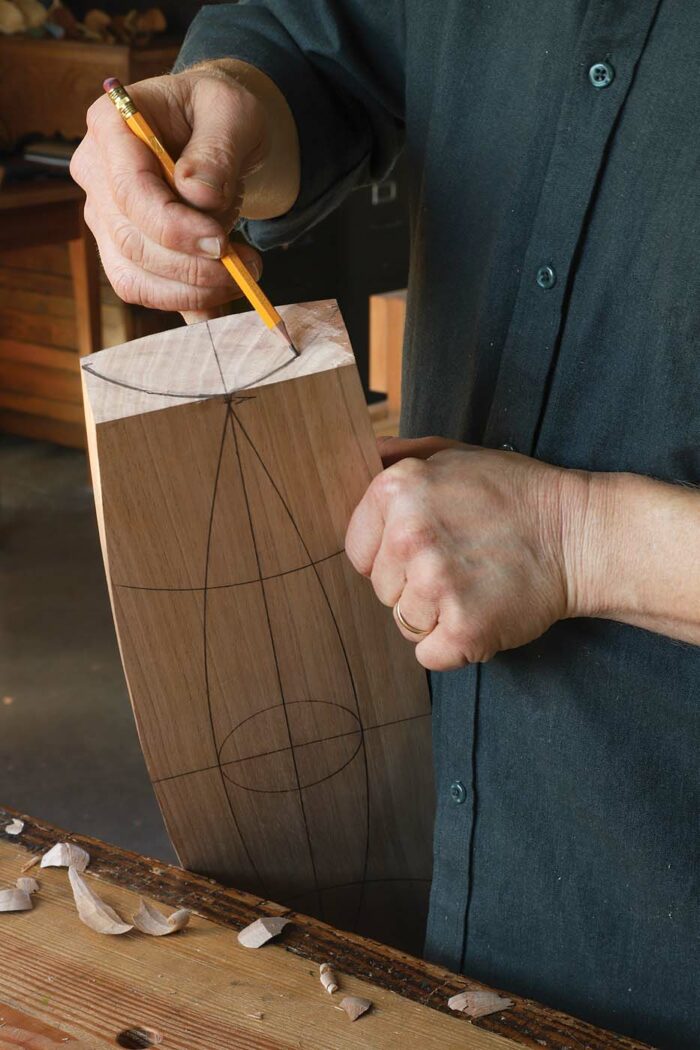
Holding the bowl on edge in a vise, remove the wood between the outer line of the foot and the line on the side near the lip of the bowl, all the way through the end of the blank. This surface should be slightly convex in both directions to mirror the form of the hollow. You can leave the surface straight from the drawknife, or finish with a spokeshave or block plane.
 |
 |
More excavation underneath
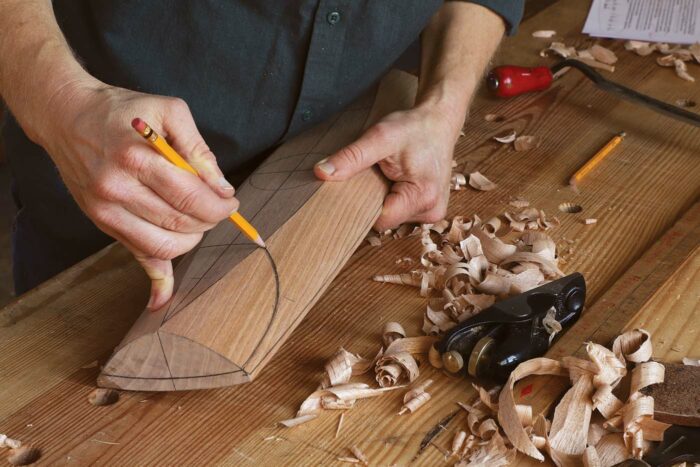
A little more layout guides the shaping under the handles. Draw a line on the end grain of the bowl that is 3/8 in. below, and parallel to, the curved upper surface. On the sides of the bowl, draw a curve by eye from the corner of the foot up to the lower corner of the handle. Now you’re ready to carve.
 |
 out, use a drawknife or hand plane to shape the end to a curve. |
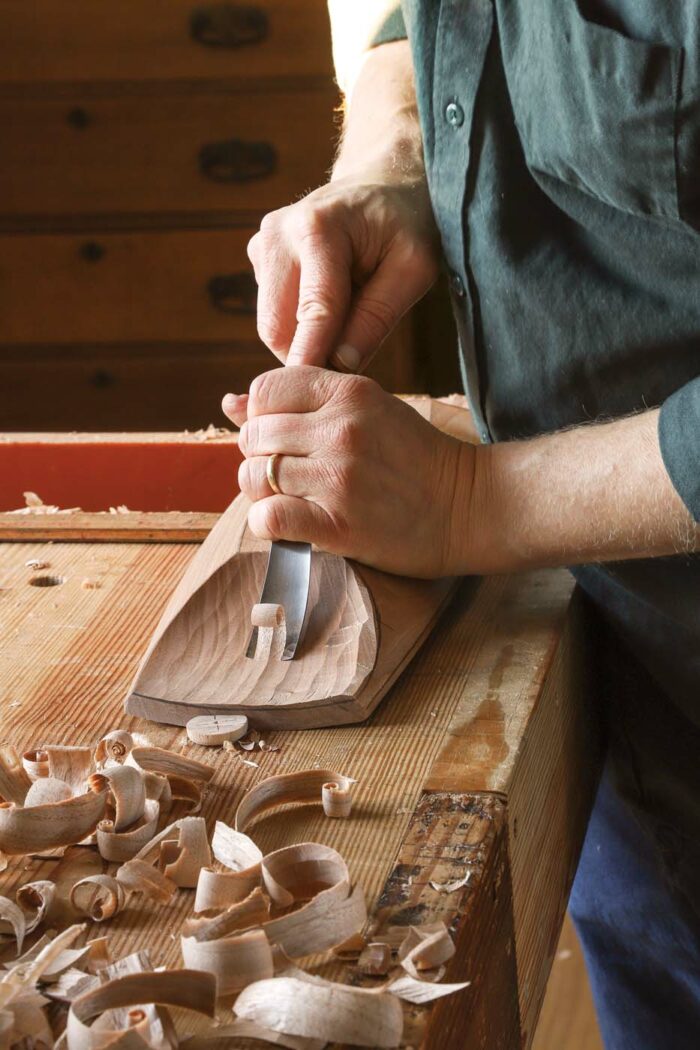
With the bowl upside down on the bench, remove the bulk of the wood under the handles with the #8 gouge and a mallet. Next, shape the ends of the handles to an arc, trimming them to the compass lines marked on top. Then redraw the line on the end-grain surface 3/8 in. below the top. Refine the area under the handles with paring cuts from the #5 gouge, leaving the surface slightly concave in both directions.
Lightly plane the foot to remove any marks and to make sure the bowl sits evenly. Finish by freshly planing the upper surface with a sharp and finely set block plane, leaving the arched top ever-so-slightly faceted. Ease the sharp corners all around the bowl by creating crisp chamfers with a knife. Take your time, and make light cuts.
If you plan on doing some decorative carving on the handles, now’s the time. Then finish with a food-safe drying oil. I typically use pure refined linseed oil or a blend of linseed oil and beeswax. Now your bowl is ready to serve.
-David Fisher works wood in Greenville, Pa.
| From Fine Woodworking #315
To view the entire article, please click the View PDF button below. |
 |

Gouges for Green Woodworking

Carve Your Daily Bowl

Carve a Greenwood Bowl with David Fisher
Fine Woodworking Recommended Products

Suizan Japanese Pull Saw
A versatile saw that can be used for anything from kumiko to dovetails. Mike Pekovich recommends them as a woodworker’s first handsaw.
Sign up for eletters today and get the latest techniques and how-to from Fine Woodworking, plus special offers.
Download FREE PDF
when you enter your email address below.
View PDF


:max_bytes(150000):strip_icc()/Byr_ManiOfTheDay_Social-a20305d6b25c4680abe24f17ba6c15d0.png?w=1300&resize=1300,800&ssl=1)


