
Marquetry with the Shaper Origin

In this video, we hang out in the shop with Hugo Nakashima Brown as he walks us through how he uses the Shaper Origin to set up and cut clean, super-precise marquetry. Hugo began creating these marquetry portraits during his winter residency at Penland this year: you can read more about his thoughts behind the concept here. By recently introducing the Shaper Origin into his arsenal, he was able to make these pieces on a larger scale.
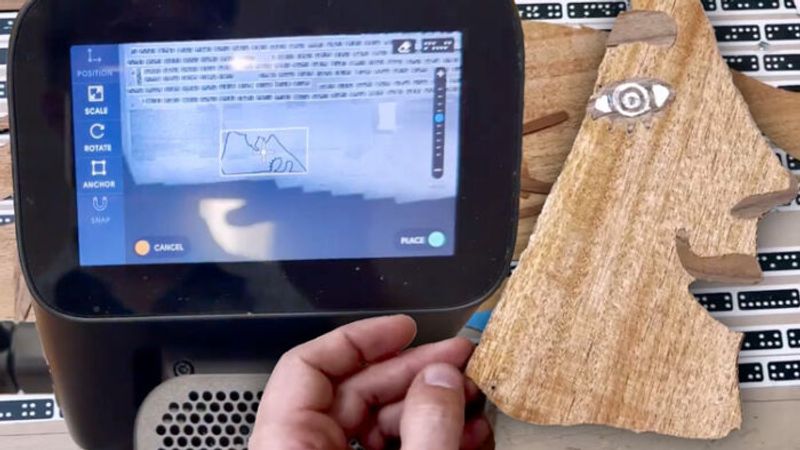
Hugo starts by showing how he gets things set up: prepping veneers, paying attention to grain direction, and making sure everything is secured so it’s ready for cutting. He also walks through his Origin setup: laying down ShaperTape on a proud surface, matching the thickneess of his commercial veneers, scanning the workspace, and loading his design right onto the tool. It’s a really smooth workflow and takes a lot of the guesswork out of lining things up.
When he gets into the cutting, you see why he uses the Origin’s built in features for marquetry. Instead of doing everything with a knife or fret saw, he uses the Origin’s fine adjustments and offset controls to get super clean, tight-fitting parts. He mentions you can achieve this with a CNC as well, just by making a few adjustments. Cutting the positive and negative pieces off the same digital file means the veneers fit together almost perfectly, which is huge when you’re dealing with tiny, delicate shapes. If you’re curious about marquetry, or just want to see a really smart workflow in action, Hugo’s process is full of ideas you can bring right into your own shop.
Sign up for eletters today and get the latest techniques and how-to from Fine Woodworking, plus special offers.

