Enjoying the smell of a favorite candle is one of life’s little pleasures. To make my rental house more homey, I’ve been using candles much more often. But have you ever heard of ice candles? Yes, you actually use ice! Using ice gives the candle a unique and slightly unpredictable texture.
The process of making an ice candle is simple, but the result is stunning. The first step is to find a suitable mold, which can be anything from a plastic container to a metal can. Milk or juice containers work great.
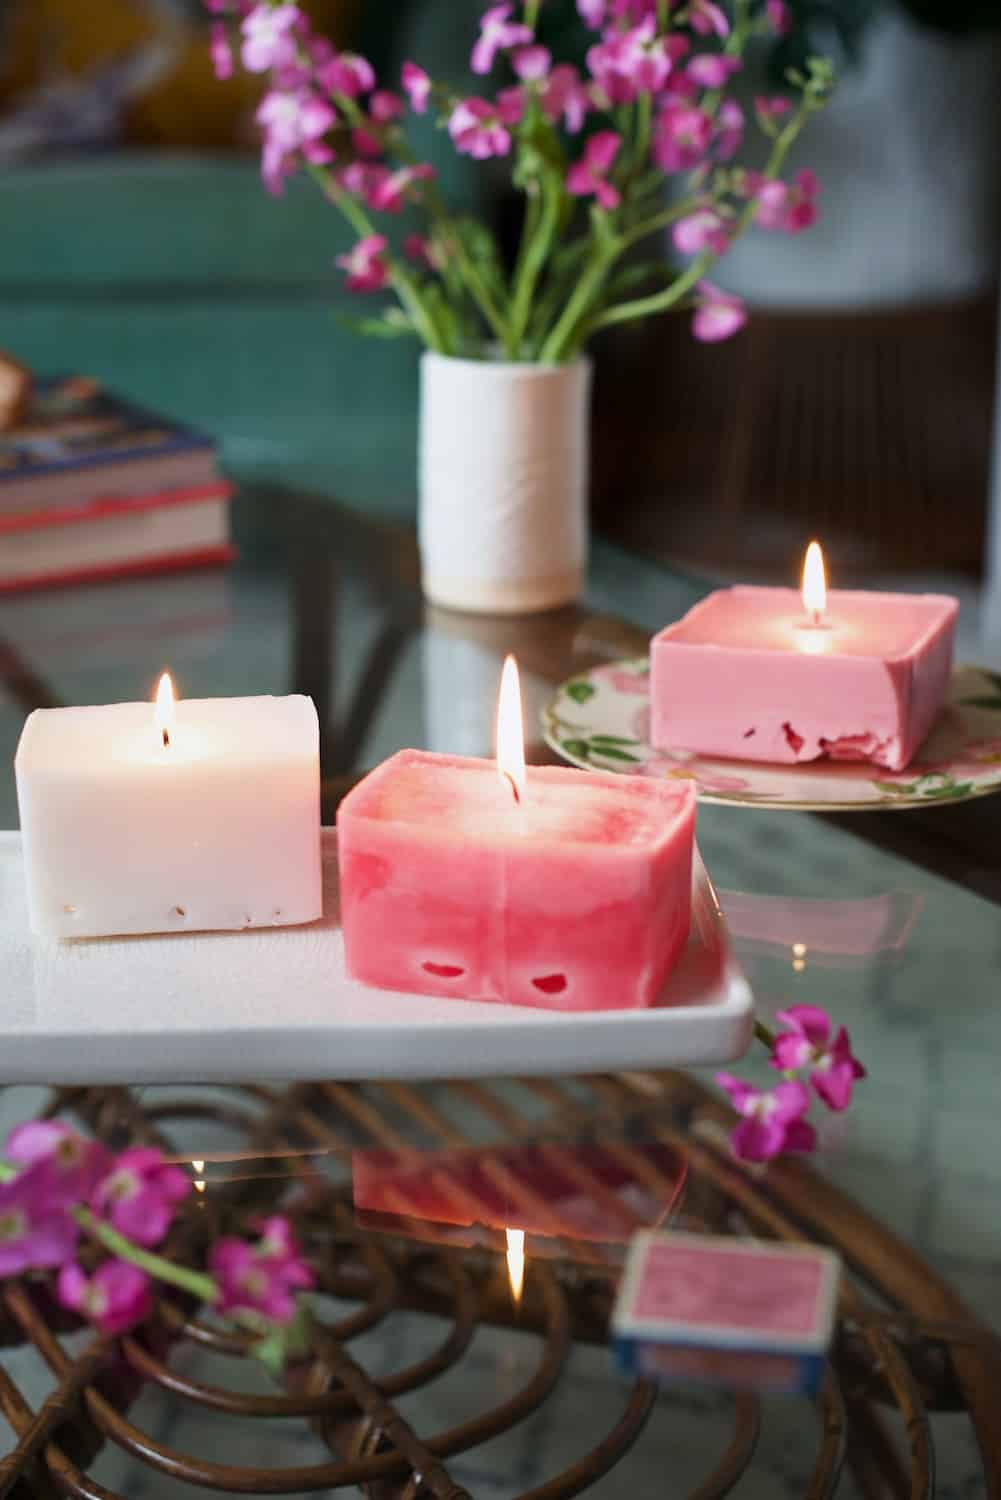
If you find an inexpensive candle that smells good but has a container that isn’t so lovely—or if you have a few half-used candles that need a new life—you can recycle your favorite scent into an ice candle.
The thing I love most about these candles is that each one turns out so differently as the ice chips work their magic.
Jump to:
Supplies for Ice Candles
– Old candles you want to recycle. Here is a good resource on how to get the wax out of old candles. Of course, you can also use new candles or even soy wax if you want to start from scratch.
– Molds. We used milk cartons, but other similar containers should work well, too.
– Wicks. If you’d rather not buy them, you can easily make your own by dipping cotton string in wax.
– Pencils or chopsticks to hold the wick in place
– Ice chips. Not ice cubes. Large ice cubes might cause entire caverns to form in your candles, which can lead to the candle crumbling and falling apart. Opt for medium- to large-sized ice chips instead. When it comes to choosing the right size ice chips, it’s worth the little bit of extra effort to ensure your candles don’t have gigantic holes in them–or worse, fall apart entirely.Â
To recycle an old candle in a glass container, place the candle in the freezer overnight. The wax should pop out of the container when you remove it from the freezer in the morning, but you can also use a butter knife to loosen it if needed. Then cut the wax into thick chunks.
Cut the top off an old milk carton and thoroughly clean and dry it. Then glue the wick to the bottom of the carton with waterproof glue. Wrap the top of the wick around a pencil or chopstick and set it on top of the carton.
Melt the wax using a double broiler. When it’s ready to pour, fill the milk carton with ice chips. (Try not to use too many small pieces of ice or your candle might fall apart in the middle.) Then pour the melted wax into the carton and cover the ice.
Let the candle sit for a couple of hours and pour out the water from the melted ice. Then tear away the carton from the candle. Depending on how the ice melted in the milk carton, you might have some pieces missing from the candle. Trim the wick, light your candle and enjoy.
Variations
If this tutorial is not right for you, we have a few variations for you to consider:
Scented Ice Candle Recipe
- 1 pound of soy wax
- 1 tablespoon of beeswax
- 1 wick
- Ice chips
- Essential oils (your choice of scent)
Melt the soy wax and beeswax together in a double boiler. Once melted, add in your choice of essential oils and stir well. Dip the wick into the wax and place it in the center of a clean glass container. Fill the container with ice, leaving about an inch of space at the top. Slowly pour the scented wax over the ice until it reaches the top of the container. Let the candle cool and harden for several hours. Remove the ice from the center of the candle, and light the wick to enjoy the lovely scent!
Colored Ice Candle Recipe
- 1 pound of beeswax
- 1 tablespoon of coconut oil
- 1 wick
- Ice chips
- Candle dye (your choice of color)
Melt the beeswax and coconut oil together in a double boiler. Once melted, add in your choice of candle dye and stir well.Dip the wick into the wax and place it in the center of a clean glass container. Fill the container with ice, leaving about an inch of space at the top. Slowly pour the colored wax over the ice until it reaches the top of the container. Let the candle cool and harden for several hours. Remove the ice from the center of the candle, and light the wick to enjoy the beautiful colored glow!
DIY Ice Candles FAQ
Yes, you can leave out the ice chips and just pour the wax directly into your milk carton. You won’t get the textured effect, but you will still be able to use the carton as the mold to form your candle.
When you pour the melted wax into the carton, you will want to make sure you that you have enough wax to cover all of the ice. Your ice-to-wax ratio should skew in favor of having more wax than ice.
You can break the glass if you’re in a hurry by placing the candle in a plastic bag, tying it closed and then shattering it and rinsing off any shards of glass that remain. But if you have the time, placing your candle in the freezer overnight is a foolproof method to remove a candle from the jar.
Freezing a candle will shrink the wax. When you take it out of the freezer, you can flip it upside down. The wax should slide right out, but if it doesn’t, you can use a butter knife to lift the wax out of the container.Â
These DIY ice candles are a great way to repurpose old candles that you’ve mostly used or want to breathe new life into. Simply remove the candle wax from their current jars using the methods described here, cut the wax pieces into chunks and melt in the double boiler.Â
How to Recycle Old Candles and Make Ice Candles
Use ice to give DIY candles a unique and slightly unpredictable texture.
Equipment
-
Double boiler
-
Knife
-
Cutting board
-
Scissors
Materials
- Old candles to recycle, new candles or soy wax (if you want to start from scratch)
- Cardboard containers, like milk cartons
- Wicks
- Pencils or chopsticks
- Waterproof glue
- Ice chips
Instructions
-
Remove candle wax from glass container by placing candle in freezer overnight. The wax should pop out when you remove it from the freezer and turn it upside down, but you can use a butter knife to loosen it if needed. (You can also break the glass container and remove the wax by placing the candle it in a plastic grocery bag and smashing it until the glass breaks, but be very careful! After glass has been removed, rinse off the candle to get rid of any shards.) Cut the wax into thick chunks.
-
Cut the top off an old milk carton and thoroughly clean and dry it. Then glue the wick to the bottom of the carton with waterproof glue. Wrap the top of the wick around a pencil or chopstick and set it on top of the carton.
-
Melt the wax using a double broiler. When it’s ready to pour, fill the milk carton with ice chips. Then pour the melted wax into the carton and cover the ice.
-
Let the candle sit for a couple of hours and pour out the water from the melted ice. Then tear away the carton from the candle. Depending on how the ice melted in the milk carton, you might have some pieces missing from the candle. This adds character! Trim the wick, light your candle and enjoy.
Notes
Use medium-sized to large-sized ice chips and not ice cubes to make these candles, as large cubes can cause your candles to fall apart. Also, try not to use too many small pieces of ice or your candle might fall apart in the middle.