
After the kids left the nest, our thoughts soon turned to downsizing our home. Unfortunately for me, that meant giving up the large, purpose-built shop I’d worked in for years and replacing it with a one-car garage. I knew that if I was to maintain all the functionality I had enjoyed in my old workshop, I would need to be creative and find ways to become much more efficient and organized. Regardless of the size of your shop, I hope you find that some of the solutions I discovered will enhance your shop’s usefulness.

Clearing the floor
I won’t pretend that moving into a smaller space didn’t involve a few compromises. Larger tools that I seldom used just didn’t make the cut when it was time to relocate. However, in a few cases I was able to come up with solutions that allowed me to keep machines in the rotation without taking up valuable floor space.

One space-saving move was to get rid of my freestanding router table. To take its place, I built a router tabletop (two layers of plywood topped with laminate) and mounted it to the right wing of my table saw, bolting it to the saw top and to the saw’s fence guides. I customized it to accept the JessEm Rout-R-Lift II, which has a convenient crank system that allows me to quickly drop the bit below the surface of the table whenever I need the full width of my table saw. As an added benefit, my table saw’s fence can serve as a fence for the router table for quick jobs. For larger or more complex setups, I built a new router fence with a dust-collection port and an adjustable split fence plate. The new fence attaches to the router table with two bolts that ride in slots and tighten with clamping knobs, so despite its much fuller functionality, it is very quick to remove when necessary.
|
|
|
An outlet switch mounted to the underside of the saw wing facilitates easy control of the router without requiring me to fumble for the on/off toggle on the router itself. Quick access to the cutoff switch is an important safety feature to consider.
|
|
|
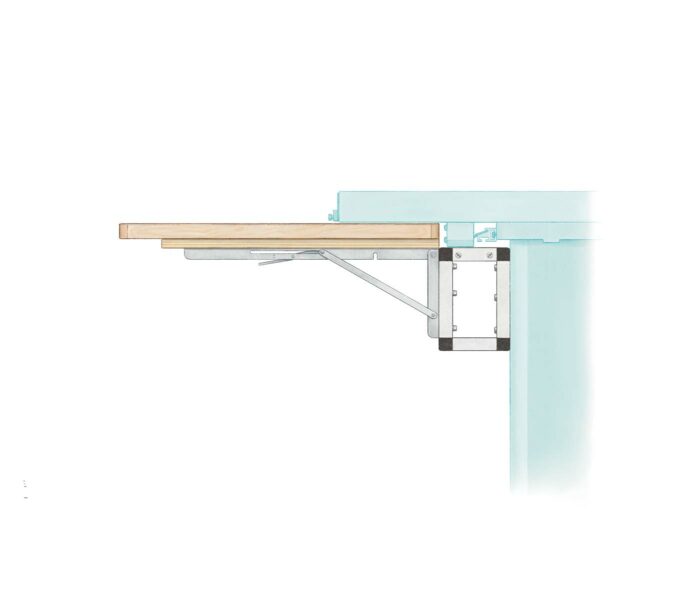
Another space saver was my decision to construct a flip-up outfeed table for the table saw. It gives me both a good-size outfeed surface and, when the outfeed is not needed, full access to floor space that would otherwise be unusable. I found the long, locking hinges I needed on Amazon. To mount them to the saw cabinet while creating the gap between the outfeed table and the saw top that is required by my saw’s fence, I fabricated some custom brackets. To make them, I simply cut lengths of square aluminum tube stock and linked them with 90° corner connectors.
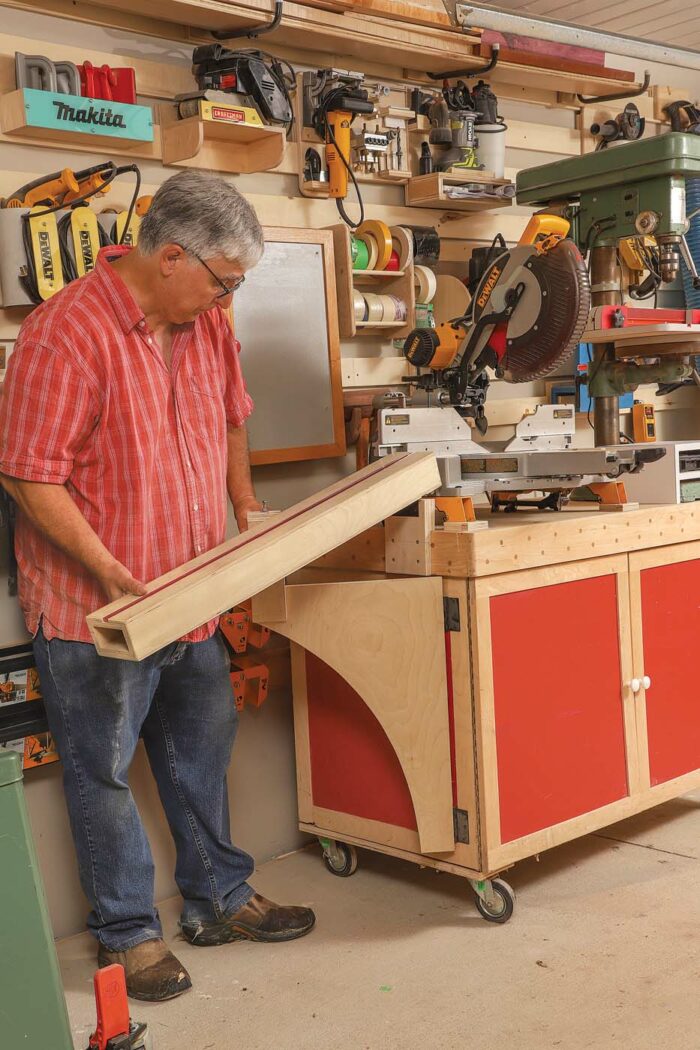
The miter saw is another tool that can take up a lot of room when it’s mounted on a dedicated stand. To conserve space here, I moved my miter saw to the top of the cabinet that is also home to my benchtop drill press. The drill press is situated toward the back so it doesn’t interfere with the miter saw. To safely support longer stock being cut on the miter saw, I added a hinged extension arm to one end of the cabinet that can be flipped up whenever it’s required. A shop vacuum inside the cabinet is the dust collector for the miter saw. Its hose snakes out the back of the cabinet and connects to the saw’s dust port. Both the saw and the vacuum are connected to an iVAC automated vacuum switch, which turns the vacuum on when the saw is powered up and keeps the vacuum running a few seconds after the saw is turned off to clear debris.
 |
 |
One of my more out-of-the-box ideas was to accommodate my lathe. I don’t do a lot of turning, but when turning is required for a project, the lathe is the only tool for the job. My solution was to attach the lathe to a hinged bench, an arrangement that allows me to store the lathe vertically when it’s not in use. The bench is supported on the hinged end by a base cabinet that is bolted permanently to the wall studs. The other end of the bench features folding legs that swing down when it is lowered. My turning tools are stored on a section of the wall that is obscured when the lathe is up but exposed, and an arm’s length away when it is down.
Let’s roll

With a small shop like mine, mobility is essential to maximizing the utility of every square foot of real estate. My strategy was to mount all my stationary tools on sturdy mobile tool bases and all of my floor cabinets and benches on heavy-duty locking casters. The HTC2000 Mobile Machine Base sold by Lee Valley is a great choice for larger tools like the bandsaw or jointer because it has the capacity to carry a hefty 500 lb., and the unique cam system allows the tool to be lowered directly to the floor for maximum stability. When it comes to casters, it’s important not to cheap out; you need something that will stand up to the rigors of shop life. Also, at least two of the casters for each base cabinet require brakes to prevent movement while you work.
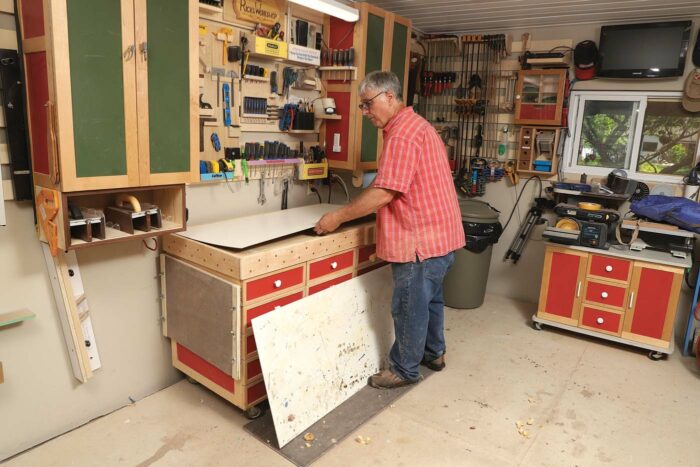
When I built my primary workbench—actually, a cabinet filled with drawers that has a large, flat top surface—I put it on casters and designed the unit to be slightly lower than the top of my table saw. When I’m cutting full sheets of plywood or MDF, I can roll the bench into place behind the saw’s outfeed table to serve as an outfeed extension table.
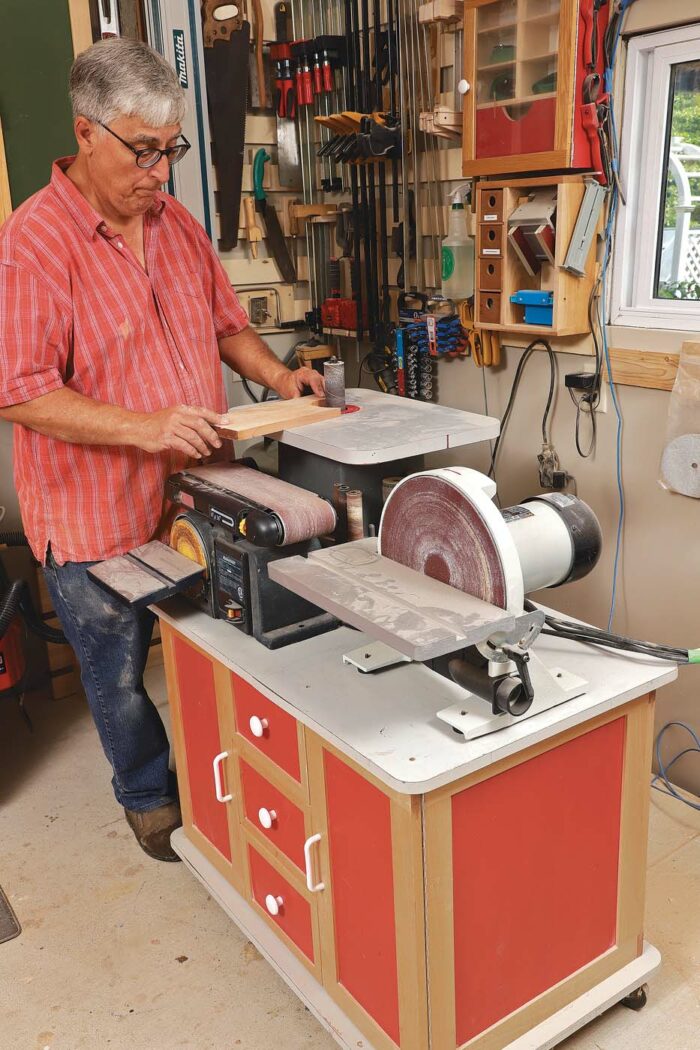

Now that all my stationary tools, floor cabinets, and benches have wheels, I can rearrange my shop in a matter of minutes to accommodate any task at hand. When the weather cooperates, I can even roll my bench and other equipment onto the driveway to take on more-ambitious projects.
Small-shop advantages
You may be surprised to learn that there are a few benefits to having a smaller workspace. For example, smaller shops are much easier to heat and cool. For my workshop I simply suspended a 240-volt electric heater from a cleat-mounted hook. These compact but powerful small-shop heaters take up very little room, are easy to install, and are friendly to the budget. Although electric heat tends to be more expensive to run than the gas or propane alternatives, smaller spaces can be brought up to a comfortable temperature quickly, so the heater only runs when I’m actually working in the shop, helping keep the electric bill down.

Dust collection is also simplified in a smaller workshop. My dust collector mounts on the wall, freeing up floor space to park tools underneath. A 20-foot-long flexible hose allows me to quickly connect the nozzle to any tool in the shop. With no hard ducting to deal with, if I decide to reorganize the shop’s layout, all I need to do is move the dust collector to another wall location. Wall-mounted dust collectors have another advantage. When it comes time to empty the bag, I just roll my trash can underneath, unzip the bag, and let gravity do the work. No more struggling with awkward strap clamps to detach the collection bag.
Wall storage

Pegboard is a good option for tool storage on the walls of a shop, but I decided to go in a different direction, installing a French cleat system for hanging custom-made shelves, tool holders, and cabinets. I lined the walls with evenly spaced wood strips that are fastened securely to the studs with long screws. The top edge of each strip is beveled at a 45° angle to engage with an opposing bevel on cleats attached to the back of individual tool racks and fixtures. The French cleat system is extremely flexible; it has enough strength to support heavy objects, yet it enables you to lift any item off in a heartbeat. I made the wall cleats from 3-in.-wide strips of 3/4-in. plywood, mounting them on the top half of all my available wall surfaces with 3-in. screws driven into every stud. For heavier objects like my movable wall cabinets, I used a pair of cleats on the back of the cabinet to help support the extra weight and share the load. It was a lot of fun building all the customized racks and fixtures to store my diverse collection of tools.
Downsizing is never done

One of the pleasures of having your own workshop is the ability to tailor the space to meet your requirements. I’ve been working in my completed shop for a couple of years, and I’m pleased with the decisions I made along the way. Until I embarked on this project, I never realized how4566889much space was wasted in my previous shop. I’m sure that over time I will find a few more tweaks to make my workspace even more efficient and enjoyable to work in.
Rick Campbell’s tidy shop is in London, Ont., Canada.
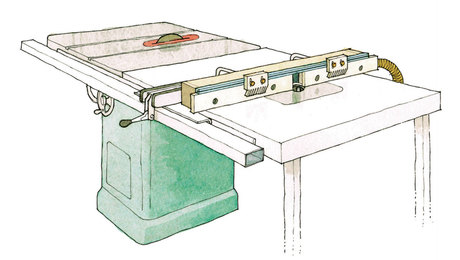
Free Plan: Table Saw/Router Combo
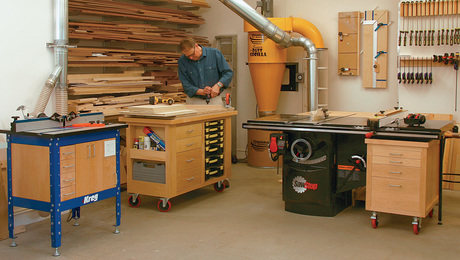
Organize Your Shop with Smart Carts

Wall-Mounted Dust Collectors
Fine Woodworking Recommended Products

Woodriver Rechargeable Desiccant Bag
Placed in a drawer, cabinet or closet, the bag immediately begins to absorb moisture from the air, which reduces corrosion.
WoodRiver Router Bit Storage Case
Molded from high impact clear ABS, this WoodRiver case provides a strong storage solution to keep your router bits safe and dry.
Sign up for eletters today and get the latest techniques and how-to from Fine Woodworking, plus special offers.


